[2 Dec 2025: Preserved as originally written in 2020, though my writing style has since changed.]
-------------------------------------------------------------------------------
Project breakdown
League of Legends, A MOBA (Multiplayer Online Battle Arena) is the most popular game on the planet, with a total of 150 million registered players and over 117 Million players that are actively playing every month. As an active player at the time, something caught my attention, and it wasn’t about the game, but more so its competitor, Dota 2.
In April of 2019, the Dota e-sports world champion team, OG was up against a new team. But it wasn’t any team, it was OpenAI Five; a neural network that was trained with 45,000 years of Dota 2 gameplay. Not only did they win, but they swept the world champions back-to-back to win the best of three. The e-sports world was in shock at this technology, and everyone was eager for League to reproduce the same technology. But they refused.
During the month of December 2020, I decided to take on the novelty project of creating my own unbeatable League of Legends bot. It wasn’t done before and was going to be a stunning project that many users would utilize and would gain lots of attraction throughout the internet, I thought.
To quickly outline my project, I will create a bot that will play a small community game mode called Mundo Dodgeball which is a 1v1 game where each player must use the champion Mundo (1 of over 150 champions in the game) to throw Axes at each other. If an Axe misses, you lose health. If an Axe hits, you gain health but also damage your opponent. The first person to slay their enemy wins. The idea seemed reasonable and almost mimicked OpenAI Five but on a much smaller scale.
The problem
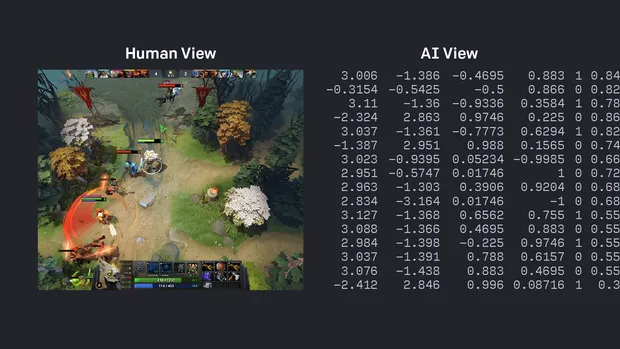
It didn’t sound like the hardest project I thought, I would just have to use a public API to get the game state and train a model based on a reward system. The metrics for the reward system are straightforward; avoiding getting hit by the axes and successfully striking the opponent.
It became apparent however that, unlike Dota, League of Legends does not have a public API.
Okay, fine. I could just build a script to access the computer’s memory and retrieve the information I need from there (i.e. the position of characters and the health bars). Although, it wasn’t long before I realized this was inapplicable, not because it was against the policy of the game, but because League has unrivaled protection and security. Any actions that try to access the game’s memory will be flagged as malicious and your account will get banned, permanently.
At this point, the project seemed to be out of my limits. The only other option I could think of is using Object Detection, which seemed like a great alternative. However, there are major downsides that involve -
Taking thousands of screenshots of the game and having to manually label each image.
Creating dataset images varying in size, coloring, and orientation for the model to be robust enough
Implementing additional object detection for the axes that will be thrown at the bot which must be dodged
To conclude, this requires too much effort.
The Solution
It only took the next few days until I had the eureka moment; to create the images synthetically, but in such a way that it effectively mimics the environment, so that once the model is run on the game, there is no loss in performance. Luckily, there is a website called Teemo.gg that has the 3D models of the characters and I could easily get screenshots of the map. All I needed to do was piece together these components and it should leave me with images that not even players can distinguish between the fake and the real.
This technique would also allow me to know exactly where each object is on the scene. With a successful object detection model, I would be able to pair this neural network with a Python script that would interpret the data and execute precise actions based on the state of the game. The implementation became clear in my head and it was time to code.

Technical
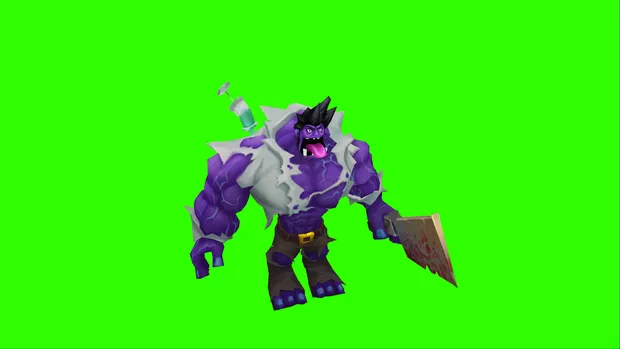
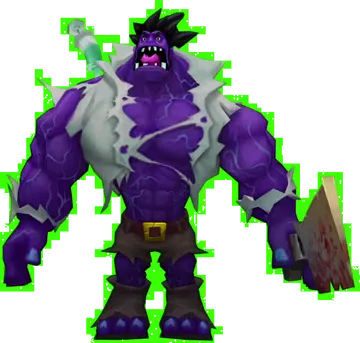
First I wanted to create a single synthetic image before creating thousands. In order to create the image, I would need a png image of the Mundo character and use Python to overlay the image onto the map in such a way it would look realistic.
Unfortunately, Teemo.gg does not have any way to export a sequence of images with a transparent background. But they allowed me to change the background color. Well, that would mean I would need to create the images with a solid green background and simply key out the color using another Python script.
Let’s first load the image and call a function we will create to replace all the green-colored pixels with a transparent pixel.
# RGBA value for a transparant pixel
TRANSPARANT =[0, 0, 0, 0]
# Green colour
GREEN = [0, 255, 0]

# Read image using OpenCV
image = cv2.imread(os.path.join(folder_path, file_name))

# Make sure image exists in folder
if image is not None:
  img = remove_background(final_image, GREEN, TRANSPARANT)

  save_image(img)

# function to save image
def save_image(image: Image, path="./", name="remove_background_image_test"):
  ...
def remove_background(image: Image, bg_colour: tuple, replacement: tuple):
# make a copy of the image and convert it from BGR to RGBA
image_rgba = cv2.cvtColor(image, cv2.COLOR_BGR2RGBA).copy()
# convert all green coloured pixels to replacement colour
image_rgba[np.all(bg_colour, axis=-1)] = replacement
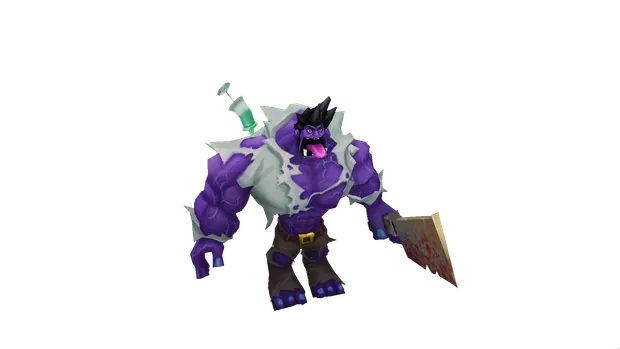
return image_rgbaThe output once we run this is exactly what I need.
That’s 1 down, and thousands more to go! To speed up the process, I would need to record my screen and turn the 3D player model in different positions. From there I can use another script to split the video into frames and then pipe the frames into the script to remove each image background. Sounds like a plan.
Not everything goes as planned, learn to adapt quickly.
After recording 4k footage of the 3D model in various different positions and poses. It was time to split the video using a quick script:
def save_all_frames(video_path: str, video_name: str, output_path: str, file_name: str, starting_count=0):
   video_capture = cv2.VideoCapture(f"{video_path}/{video_name}")

   # read frame data
   success, image = video_capture.read()

   count = starting_count

   # if success = False, this means that the video has ended
   while success:
      # save image
      cv2.imwrite(f"{output_path}/{file_name}_{count}.png", image)
      success, image = video_capture.read()

      # increase count so that files don't get overwritten
      count += 1
Then pipe the images created to the script we built previously.
Hold on, what is going on here.
It seems like since we retrieved the images from a recording, the footage was compressed (even using lossless compression), and it created artifacts. This meant that the green closer to the model was not the exact (0, 255, 0) RGB value the program was looking to replace.
To fix this issue, we need to make our program look for pixels in a specific bound, for example, if we decide our lower bound of green is (0, 240, 0) and the upper being (20, 255, 20), then the pixel with the value (18, 250, 17) would get replaced but not (30, 230, 40).
# Let's define our bounds
LOWERGREEN = [0, 240, 0, 255]
UPPERGREEN = [150, 255, 150, 255]
And then in our remove_background, we replace pixels that are in the bounds we have defined above.
# if green in bounds
arg = np.logical_and(image_rgba <= background_RGBA_upper, image_rgba >= background_RGBA_lower)

# convert all background_RGBA coloured pixels to change_to_RGBA colour
image_rgba[np.all(arg, axis=-1)] = change_to_RGBA
I encourage everyone to check out the full program since I have abstracted the code for the sake of simplicity. I have added many other functionalities such as cropping the image to the edge of the 3D model, removing edge noise that resulted in pixels towards the edge not being removed even with the bounded filter, and other required functions.
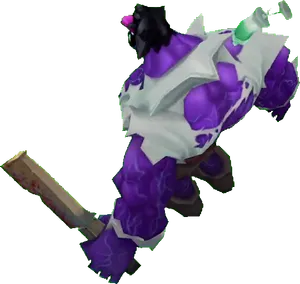
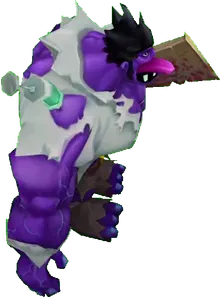
Now we can create thousands of transparent images of the 3D model in different positions. Here are just a few examples of the output:
Creating the environment
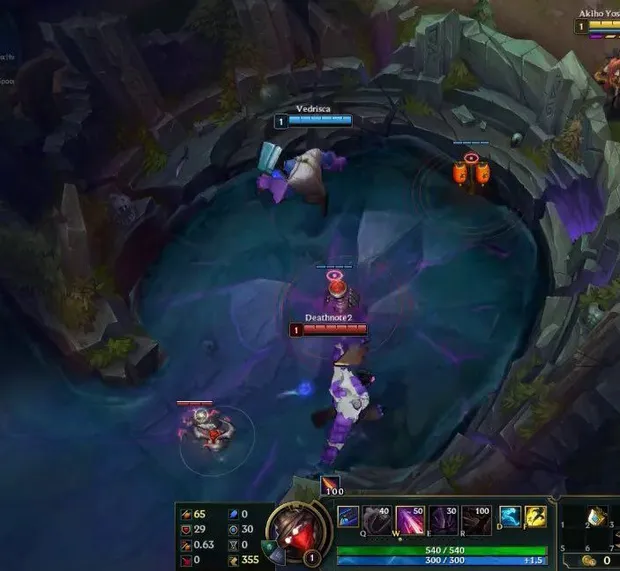
Now that we have our model ready, we can overlay the images on top of screenshots of the map where the 1v1 will be taking place. I would need to ensure that the size and placement of the image are precise and matches how it would look in-game. For example, the model must not resonate in the walls or totally outside the viewport. It must be inside the cave portion of the map. The figure below is an example of what I am aiming to reproduce.
First, I will record different angles of the pit and use my previous script to split the video into unique frames.
The function definition to merge the Mundo and the background image is
def merge_background_foreground(self, background: Image, foreground: list, resize_mult=0, count=0):Where background is the pit
foreground is a list of Images (Likely that there will be more than one Image in the foreground)
resize_mult determines how large the foreground would be, which is critical as it allows me to effectively tinker with the size of the foreground to exactly match how it would look in the game.
count allows for recursion. It will be first initialized to 0, then merge_background_foreground function would be called again recursively until all the foreground images have been pasted onto the background.
To elaborate on the foreground list type, it will be a tuple of Images paired with their object identifier. For example
[[Image1, 0], [Image2, 0], [Image3, 1]]Describes three images to be added to the foreground, two of which being a Mundo (which has the id of 0) and the other being an Axe (id 1).
# get image we are going to add to background image
foreground_object = foreground[count][0]

# get the object id - needed for identifying the object in bounding box
object_id = foreground[count][1]

# get x, y of foreground and background
foreground_size = foreground_object.size
background_size = background.size

# get position of where the foreground should move to
x_position, y_position = self.get_random_position()
Then we will resize the foreground image if a resize multiplier has been given and then paste the foreground onto the background. This method would be called recursively n amount of times where n is the number of images given as foreground
# get new x, y of foreground after resizing
new_size_x, new_size_y = int(foreground_size[0] * resize_mult), int(foreground_size[1] * resize_mult)

# apply resize onto foreground image
foreground_resized = foreground_object.resize((new_size_x, new_size_y))

# paste resized foreground onto background at poisiton
background.paste(
   foreground_resized,
   (x_position, y_position),
   foreground_resized)

# run function again if we havn't looped through all images in foreground
if count < len(foreground)-1:
   # incrememnt count
   self.merge_background_foreground(background, foreground, resize_mult=resize_mult, count=count+1)

return background
The final script however is much more complex as it keeps track of where each image is placed and creates a text file with their respected bounding boxes. It also assigns probabilities to add cursors, noise, flipping the images, and much more intricate behavior.
The final result is thousands of images, perfected for YOLOv5, the state-of-the-art object detection framework to train the images.
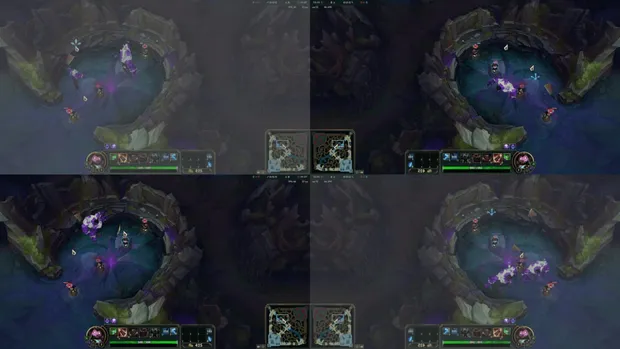
As you can see, a percentage of the images have filters applied to them to make the model extremely robust, so when it is tested in the real game, the model will not have any problems adjusting to the users’ setup. It must be highlighted however that due to restraints on the server and a lack of time, the images had to be resized and its quality changed to decrease the image file size and to speed up training.
For those interested, here is an example of the bounding box data file for an image. It reveals that the image it’s paired with has 4 foreground objects, 2 of which are Mundos and the other 2 are axes, with their normalized position values appended to each identifier.
0 0.5144230769230769 0.5528846153846154 0.11666666666666667 0.1685185185185185
0 0.42788461538461536 0.6274038461538461 0.11197916666666667 0.17777777777777776
1 0.5 0.28846153846153844 0.015625 0.07592592592592592
1 0.3629807692307692 0.5048076923076923 0.042708333333333334 0.03888888888888889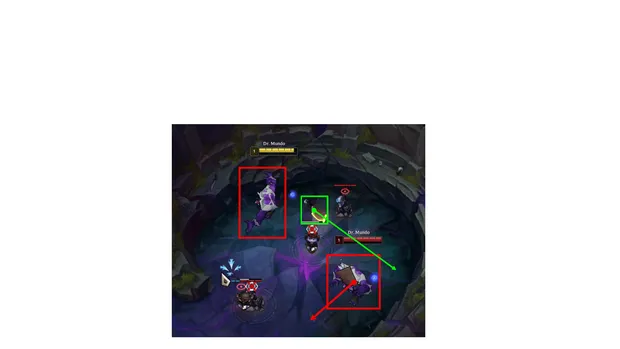
This article is the start of many where I will underline my process on how I built this cutting-edge, unbeatable bot using Object Detection and other Machine Learning libraries.
I urge any of those that are interested to take a look at the final source code since this article has heavily abstracted the techniques and functionality of the program.
https://github.com/alpharaoh/Machine-Learning/tree/main/Projects/MDAI